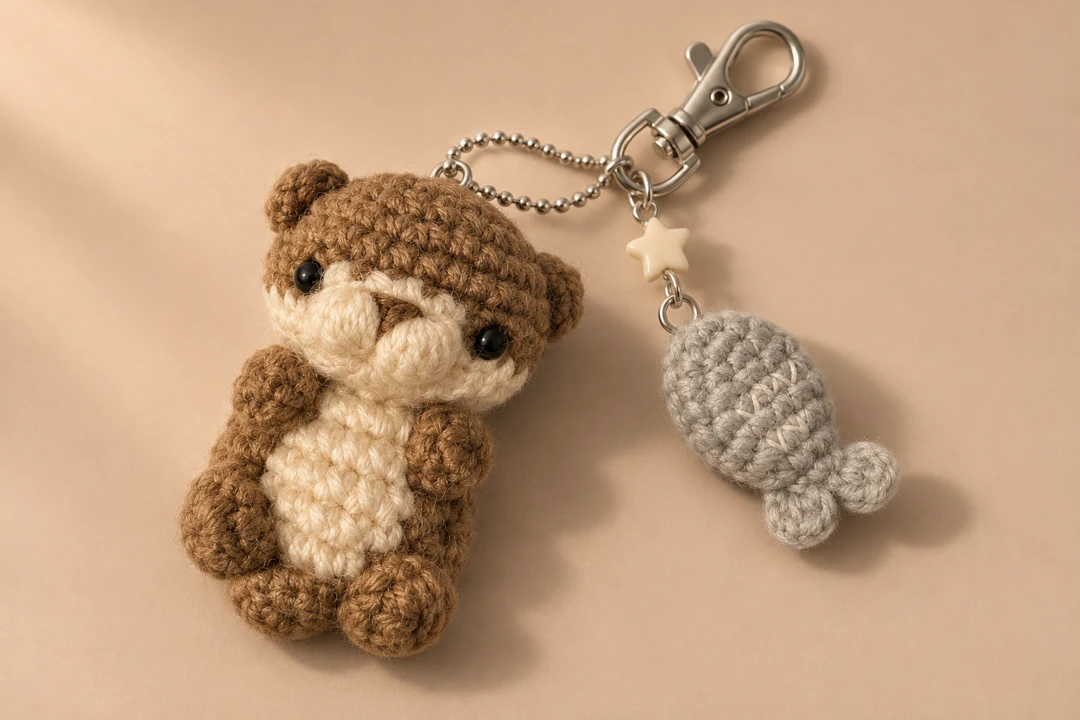
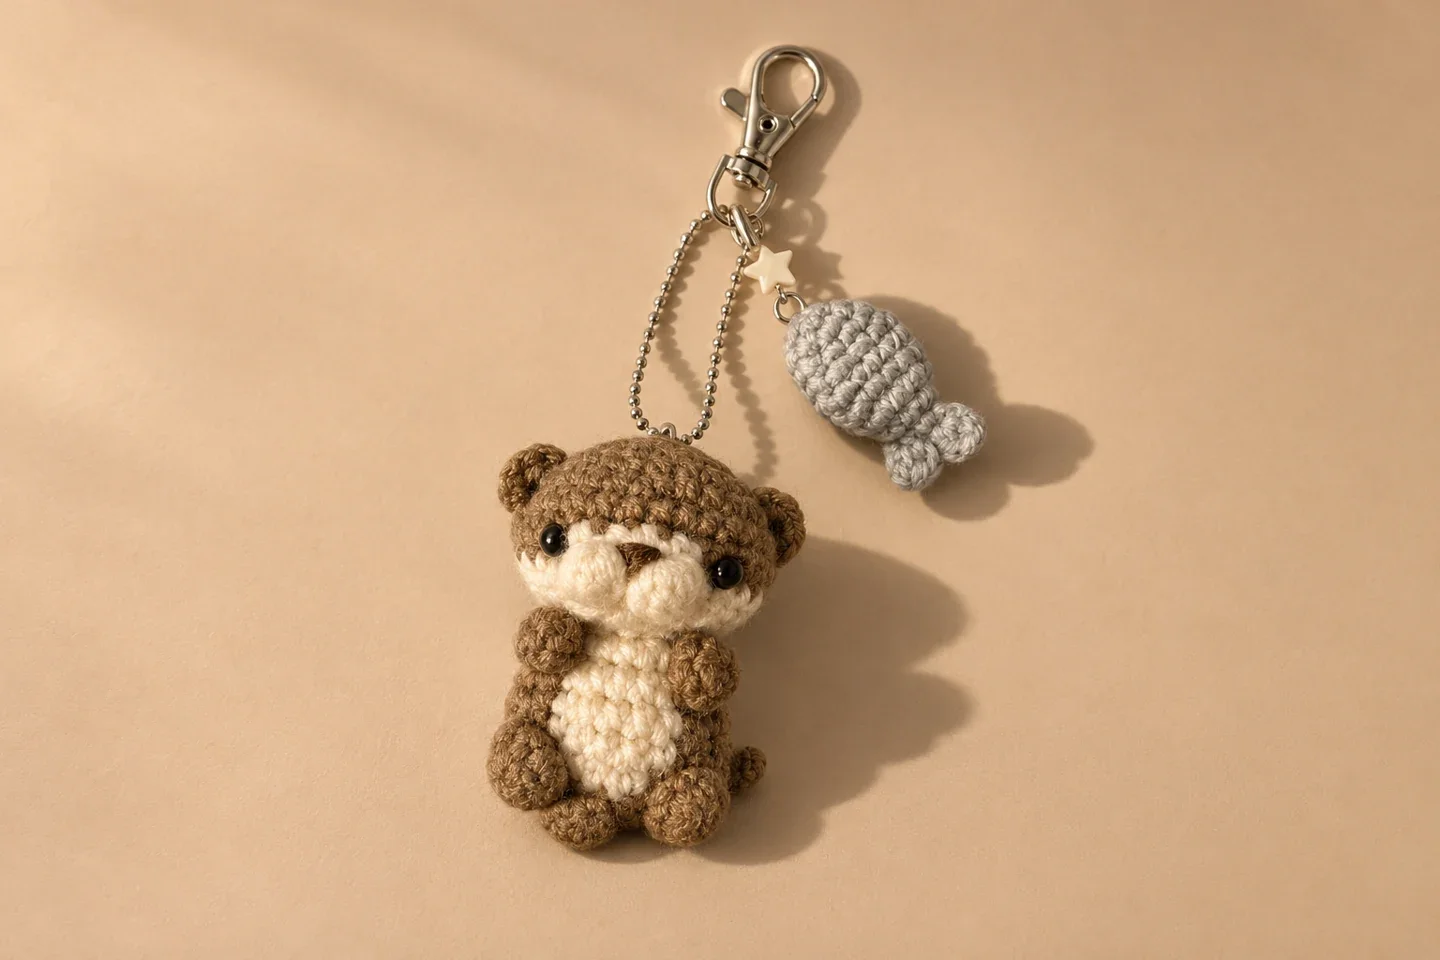
Give your keys a tiny river companion with this free crochet otter keychain pattern. The little brown otter has a cream belly, a two-piece muzzle, and rounded paws. A separate gray fish charm hangs beside it from the same clasp, so both pieces can move freely.
Pattern status. This original pattern was drafted from the supplied design reference and has yet to be test crocheted. The round counts have been checked. The finished size and yarn quantities are estimates, and the AI-generated images illustrate the intended look.
Jump to the Free Crochet Pattern ↓
Before You Start
Crochet the head and body as separate pieces. Sew the cream face patch and two small muzzle circles to the head, then attach the head to the body. The fish is a separate charm with two little tail lobes made from its flattened closing edge.
| Detail | Pattern information |
|---|---|
| Skill level | Confident beginner comfortable with small spiral rounds and sewing amigurumi pieces. |
| Terminology | US crochet terms. |
| Construction | Stuffed head and body, flat appliqués, sewn paws and tail, and a separate stuffed fish charm. |
| Estimated size | Otter approximately 2–2¾ in (5–7 cm) tall, excluding hardware. This estimate has yet to be measured on a sample. |
| Gauge | Use a firm single crochet fabric that hides the stuffing. Yarn, hook size, and tension will affect the finished size. |
Materials and Tools
Yarn and Hook
- Sport-weight or fine cotton yarn in warm brown for the head, body, ears, paws, and tail.
- Cream yarn of the same weight for the face, muzzle, and belly.
- Light gray yarn for the fish and a little dark brown embroidery thread for the nose.
- A 2.25 mm crochet hook as a starting point. Go down a hook size if the filling shows between stitches.
Start with small leftover balls of each color and leave long sewing tails. The exact yardage has yet to be measured.
Notions and Keychain Hardware
- Polyester filling, a removable stitch marker, tapestry needle, scissors, and pins.
- Two 5 mm craft eyes or black embroidery thread.
- Strong, thin braided cord for two hanging loops.
- One silver swivel lobster clasp, two small split rings, and an optional short ball chain with its matching connector.
- Optional small star charm and an additional split ring.
This keychain is an accessory. Keep small parts and metal hardware away from young children.
Stitches and Pattern Notes
| Abbreviation | Meaning |
|---|---|
| MR | Magic ring |
| ch | Chain |
| sc | Single crochet |
| hdc | Half double crochet |
| sl st | Slip stitch |
| inc | Work 2 sc in the next stitch |
| dec | Single crochet the next 2 stitches together. For an invisible decrease, pick up the front loops of both stitches before finishing the sc. |
| st / sts | Stitch / stitches |
| Rnd / Rnds | Round / rounds |
Work the stuffed pieces in continuous rounds and move your marker to the first stitch of each round. Read each repeat all the way through before starting it. To close a stuffed piece, thread the yarn tail through the front loops of the remaining stitches, draw the opening closed, then secure and bury the end.
Mini Crochet Otter Keychain Pattern
Step 1. Crochet the Brown Head
| Round | Instructions | Ending count |
|---|---|---|
| 1 | 6 sc in an MR. | 6 |
| 2 | Inc in each st. | 12 |
| 3 | (Sc, inc) 6 times. | 18 |
| 4 | (2 sc, inc) 6 times. | 24 |
| 5 | (3 sc, inc) 6 times. | 30 |
| 6–9 | Sc in each st for 4 rounds. | 30 each |
| 10 | (3 sc, dec) 6 times. | 24 |
| 11 | (2 sc, dec) 6 times. | 18 |
| 12 | (Sc, dec) 6 times. | 12 |
| 13 | Dec 6 times. | 6 |
Pause after Round 10. Mark the center of the face and position the eyes between Rounds 8 and 9, with roughly six stitches between them. Check the spacing from the front before securing the washers. For embroidered eyes, mark the positions now and embroider later. Add stuffing before the opening gets too small, then finish Round 13 and close the head.
Step 2. Make the Cream Face and Two Muzzle Puffs
Face patch. Ch 8 in cream. Starting in the second ch from the hook, sc in the next 6 ch, then 3 sc in the last ch. Rotate the chain to work along its underside. Sc in the next 5 unused loops, then 2 sc in the same chain as your first sc. Sl st to the first sc to join. You have 16 sc, excluding the join. Leave a sewing tail.
Muzzle puffs, make 2. With cream, work 6 sc in an MR, then inc in each st for 12 sc. Fasten off with a sewing tail. As you sew, let each disc dome slightly over a pinch of filling. Pin the face patch horizontally just below the eyes and place the puffs side by side over its center. Sew the patch down first, then sew each puff around its edge. Embroider a small upside-down triangle where the puffs meet at the top, with one short vertical stitch below it if you like.
Step 3. Crochet the Body
| Round | Instructions in brown | Ending count |
|---|---|---|
| 1 | 6 sc in an MR. | 6 |
| 2 | Inc in each st. | 12 |
| 3 | (Sc, inc) 6 times. | 18 |
| 4 | (2 sc, inc) 6 times. | 24 |
| 5–8 | Sc in each st for 4 rounds. | 24 each |
| 9 | (2 sc, dec) 6 times. | 18 |
| 10 | (Sc, dec) 6 times. | 12 |
| 11 | Sc in each st. | 12 |
Stuff the body, leave the 12-stitch neck open, and fasten off with a long tail for joining.
Step 4. Crochet the Cream Belly Patch
Ch 7. Starting in the second ch from the hook, sc in the next 5 ch, then 3 sc in the last ch. Rotate to the underside. Sc in the next 4 unused loops, then 2 sc in the same chain as your first sc. You have 14 sc.
For a wider second round, work inc in the first st, sc in the next 4 sts, inc in each of the next 3 sts, sc in the next 4 sts, and inc in each of the last 2 sts. You have 20 sc. Sl st to the first sc of this round and leave a sewing tail. The foundation chain runs vertically when you pin the patch on the body.
Step 5. Make the Ears, Paws, and Tail
| Piece | Instructions | Ending count |
|---|---|---|
| Ears, make 2 | Work 5 sc in an MR and join with a sl st. Leave flat and pinch the bottom edge gently when sewing. | 5 sc each |
| Arms, make 2 | Work 6 sc in an MR. Sc in each st for Rnds 2–4. Flatten the opening to sew it. Leave unstuffed. | 6 sc each round |
| Feet, make 2 | Work 6 sc in an MR. For Rnd 2 work (sc, inc) 3 times. Sc in each st for Rnd 3. Use a pinch of filling if desired and sew the open edge to the body. | 6, 9, 9 sc |
| Tail, make 1 | Work 4 sc in an MR. For Rnd 2 work (sc, inc) twice. Sc in each st for Rnds 3–4. Flatten the open edge to sew it. Leave unstuffed. | 4, 6, 6, 6 sc |
Leave a sewing tail on each piece. Keep the opening of each arm and the tail flat as you sew so the pieces lie close to the body.
Step 6. Crochet the Gray Fish Charm
| Round | Instructions | Ending count |
|---|---|---|
| 1 | 6 sc in an MR. | 6 |
| 2 | (Sc, inc) 3 times. | 9 |
| 3 | (2 sc, inc) 3 times. | 12 |
| 4–6 | Sc in each st for 3 rounds. | 12 each |
| 7 | (2 sc, dec) 3 times. | 9 |
| 8 | (Sc, dec) 3 times. | 6 |
Add a small amount of filling before Round 8. Flatten the six stitches into two layers of three. Work 3 sc across the opening, passing the hook through a stitch from each layer for each sc.
Tail lobes. From the last closing stitch, ch 3. Starting in the second ch from the hook, work 1 hdc in each of the next 2 ch, then sl st back into that same closing stitch. Sl st into the middle closing stitch and then into the opposite end stitch. Repeat the ch-3 and two hdc sequence there, then sl st back into that end stitch. Fasten off and hide the yarn tail. Add two short cream embroidery stitches to the fish’s flank for a scale detail if desired.
Assembly and Keychain Attachment
Pin the Face, Belly, and Paws
- Place one ear on each side of the head around Rounds 4–6. Check the face from the front and sew both ears in place.
- Center the narrow body opening beneath the head. Whipstitch all 12 neck stitches to a ring of stitches around the underside of the head. Make a second pass through the seam if the head still tilts.
- Pin the cream belly vertically so the top sits just below the neck. Sew around its edge. Sew one arm near each upper side of the belly and one foot near each lower corner. Add the short tail to the lower back so its tip can peek out beneath the body.
Reinforce Both Hanging Loops
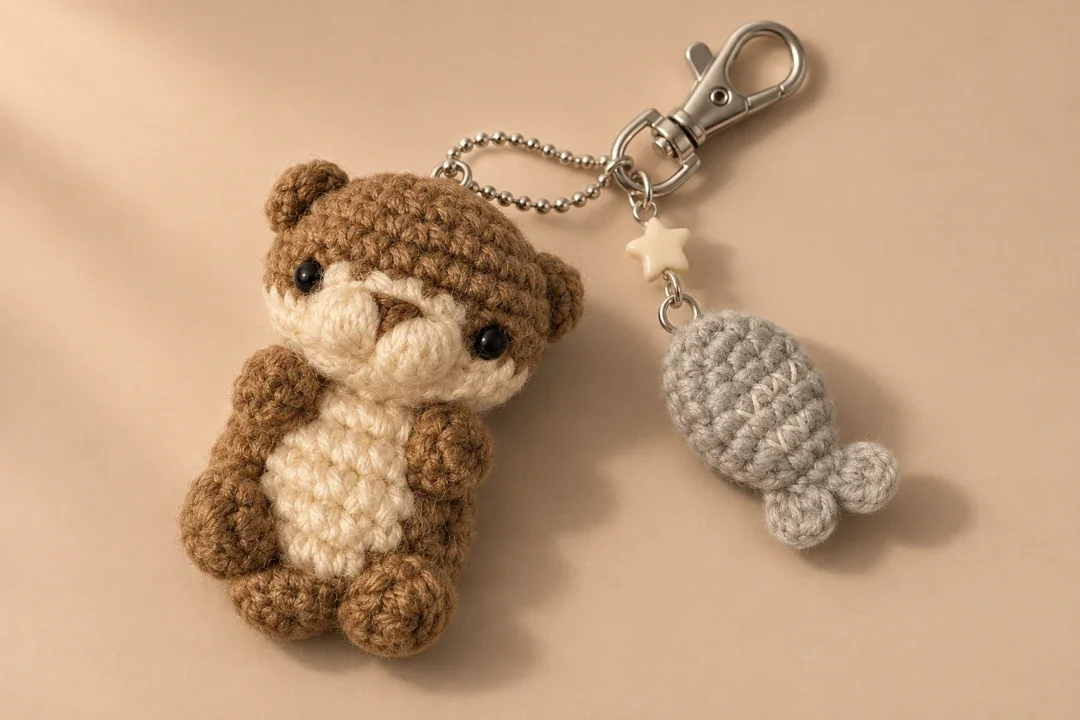
For the otter, fold a short piece of strong cord into a loop. Center it at the crown, just behind the top center of the head. Stitch the two legs down independently with several passes through different nearby crochet stitches, then bury the ends. Repeat at the nose end of the fish, anchoring the cord across several nearby stitches around the magic ring. Keep both loops short enough to sit neatly on their rings.
Attach the Silver Hardware
Thread the otter’s cord loop onto a small split ring. Put that ring directly on the swivel clasp, or use a short ball chain with its connector fully closed between the ring and the clasp. Add the fish on its own split ring at the base of the clasp so it can swing separately. If using a star charm, attach it to the fish ring or to a separate small ring. Gently pull each charm by itself to check that the cord and rings stay in place.
Final Checks
- Both ears, both muzzle puffs, and all four paws are attached securely.
- The belly sits centered under the muzzle, and the tail peeks out at the back.
- The fish has two tail lobes and can swing separately from the otter.
- The cord loops hold under a gentle pull and the split rings are fully threaded.
Tips for a Neat Finish
- The face looks crowded. Pin the patch and muzzle in place before fixing the eyes. Move the eye marks one stitch farther apart if the puffs cover them.
- The belly curls at the ends. Flatten it with your fingers and pin both ends first. Use small sewing stitches and keep the yarn relaxed.
- The fish tail twists. Check that the opening has three pairs of stitches before closing it and work the same two hdc on each side.
- The otter hangs sideways. Temporarily clip the hardware to the pinned loop and check its balance before sewing the loop in place.
Care and Variations
Spot-clean the yarn with a damp cloth and let it air dry. Detach removable hardware first. For a woodland version, use chestnut yarn with an oatmeal belly. You can omit the fish or change its color without altering the otter.
Frequently Asked Questions
Can I embroider the eyes?
Yes. Use black embroidery thread at the eye marks and make both eyes the same size before securing the ends inside the head.
Can I make the otter with thicker yarn?
Yes. Use a hook that gives you a dense fabric with that yarn. The same stitch counts will make a larger, heavier charm, so check the clasp and attachment before use.
Can I make the fish as a separate keychain?
Yes. Sew its cord loop at the nose and use a small split ring to attach it to its own clasp.
How can I keep the head upright?
Center the neck opening under the head, distribute the seam evenly around all 12 stitches, and reinforce the seam before attaching the clasp.