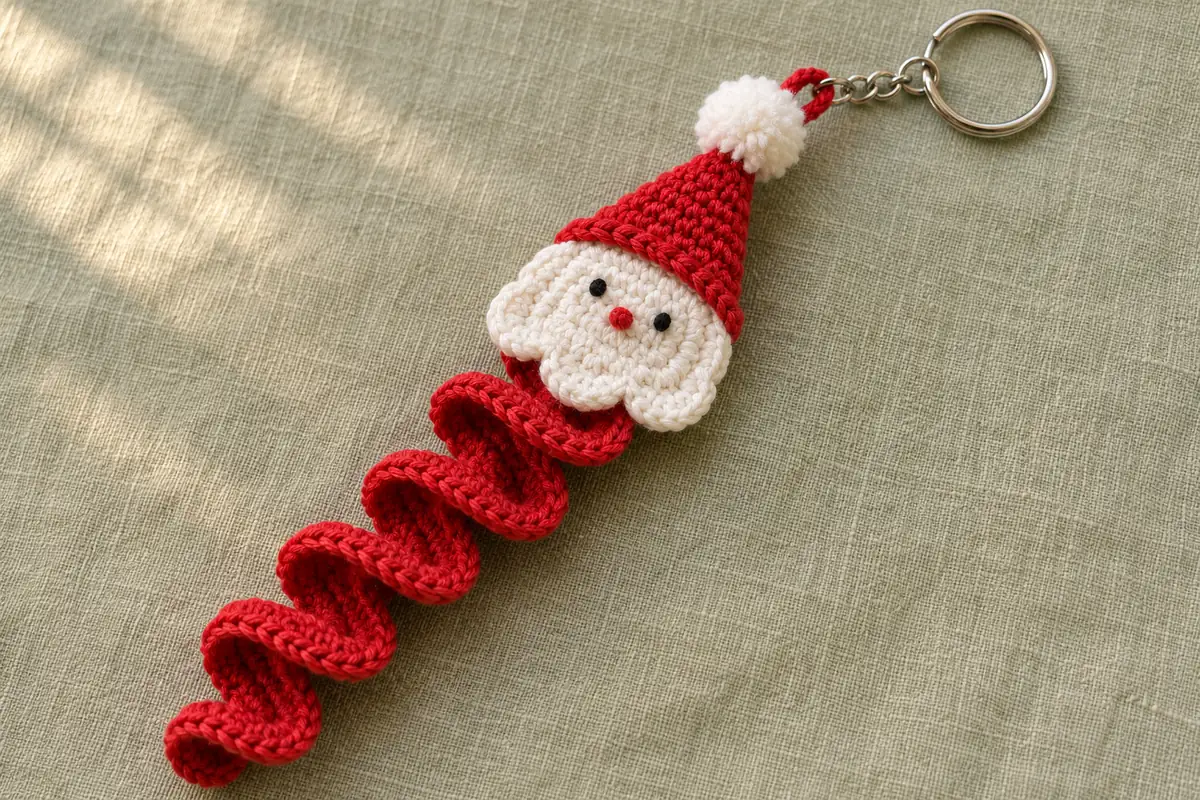
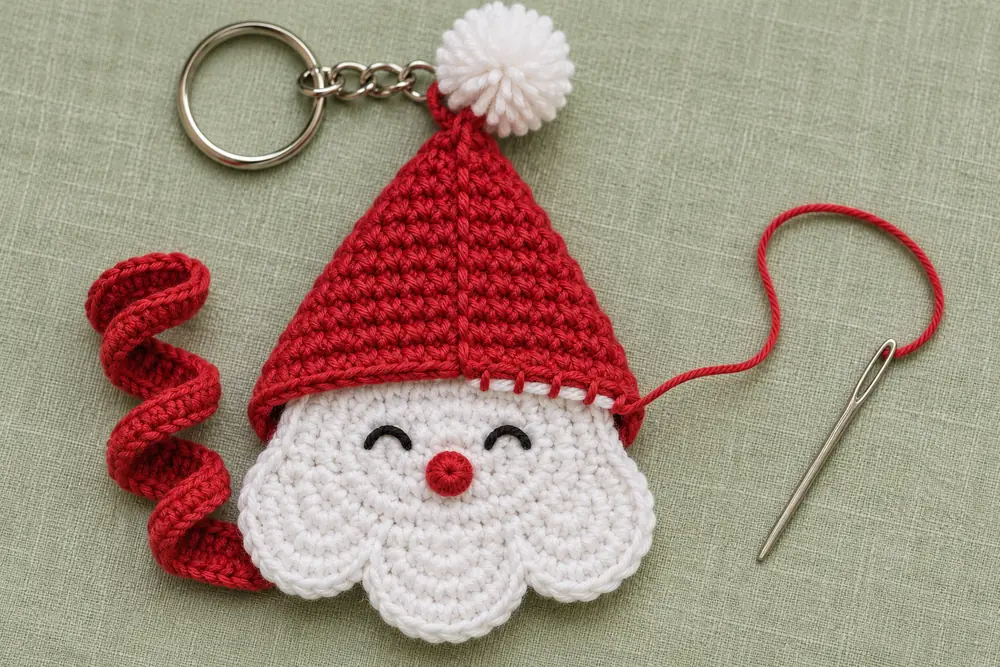
This little Santa has a springy red body, a white scalloped beard and a pointed hat with a yarn pompom. The body curls as you crochet it, and the flat face sits over the first turn of the spiral.
Pattern status — Original draft inspired by a reference image. Not test crocheted.
Jump to the free crochet pattern
Project Overview
| Skill level | Adventurous beginner |
|---|---|
| Terminology | US crochet terms |
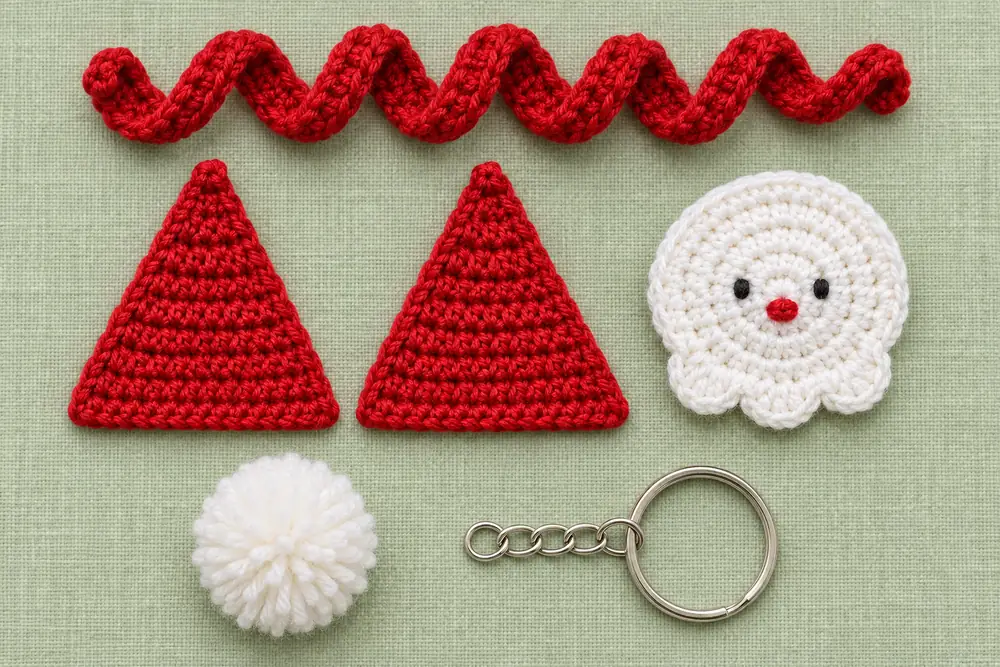
| Construction | One curl, a round face with a scalloped edge, and two matching hat panels |
| Method | Turned rows for the hat, joined rounds for the face, and hand sewing for assembly |
| Sizing | Variable. Start with 25 foundation chains for the body and measure the relaxed curl before assembly. |
Materials and Tools
- Small amounts of DK cotton yarn in red and white, plus a little black for embroidery.
- 3 mm crochet hook, yarn needle, scissors and stitch markers.
- Split key ring and an optional short chain with a small connecting split ring.
Gauge and Size
Gauge is flexible. Use a hook that makes a firm single crochet fabric for the hat and face. The length of the relaxed spiral depends on the yarn and tension. For a shorter or longer Santa, adjust the starting chain by 3 to 5 stitches while keeping three double crochets in each working chain. The hat and face counts stay the same.
US Crochet Abbreviations
MR magic ring, ch chain, sl st slip stitch, sc single crochet, dc double crochet, st(s) stitch(es).
Beginning chains and joining slip stitches do not count as stitches. Mark the first stitch of each face round so the join is easy to find.
Free Spiral Santa Keychain Crochet Pattern
1. Crochet the Red Spiral Body
- With red yarn, ch 25.
- Work 3 dc in the second ch from the hook. Work 3 dc in each of the remaining 23 chains. You will have 72 dc across 24 foundation chains.
- Fasten off, leaving a long tail at the end where you finished the double crochets. This end will go behind the face. Weave in the starting tail at the bottom. Guide the strip into a regular spiral with your fingers.
2. Make the White Face and Beard
- Round 1: With white yarn, work 6 sc into a MR. Tighten and join with a sl st to the first sc. 6 sc.
- Round 2: Ch 1. Work 2 sc in each stitch around. Join to the first sc. 12 sc.
- Round 3: Ch 1. Repeat (1 sc in the next st, 2 sc in the following st) 6 times. Join to the first sc. 18 sc.
- Beard edge: Start in the stitch just joined. Repeat (sl st in the next available st, skip 1 st, 5 dc in the next st, skip 1 st) 3 times. Slip stitch in each of the 6 remaining stitches. Fasten off with a long white tail. 3 scallops across 12 base stitches, with 6 upper edge stitches.
Rotate the disk so the middle scallop sits at the bottom and the six slip stitches sit at the top. Embroider two small black eyes above the center and a round red nose just below them. Leave room above the eyes for the hat brim. Bury and secure the embroidery tails on the back.
3. Crochet Two Red Hat Panels
Work from the point down to the brim. Make two identical panels. Ch 1 and turn at the end of each row except the final row.
| Row | Instructions | Count |
|---|---|---|
| 1 | Ch 4. Sc in the second ch from the hook and each remaining ch. | 3 sc |
| 2–7 | 2 sc in the first st, 1 sc in each st up to the last, then 2 sc in the last st. | 5, 7, 9, 11, 13, 15 sc |
| 8–9 | Sc in every st across. | 15 sc each row |
Fasten off both panels and leave a long red tail on one for sewing. Stack the panels with edges matched. Whipstitch up one sloping edge, across the short tip edge and down the opposite slope. Leave the 15-stitch brim opening free.
4. Make the White Pompom and Hanging Loop
Wrap white yarn about 25 times around a 1 in (2.5 cm) piece of cardboard. Slide off the bundle, tie the middle tightly with a separate strand, and cut the loops. Trim it to the size you want for the hat, keeping the tying strands long for sewing.
For the hanging loop, fold a doubled length of strong red yarn into a small loop. Bring the two ends through separate spaces on the back of the hat, just below the point. Stitch the ends back and forth through several rows and the adjacent seam, then weave them in. Sew the pompom beside the loop with its white tying strands.
Assembly and Finishing
- Lay the Santa face right side up with the three scallops pointing down. Tuck the top slip-stitched edge between the two hat panels. Adjust the overlap until both eyes are visible.
- With red yarn, sew each brim edge to the adjacent side of the white face. Catch the outer edge of the face and the inside of the red brim so the sewing stays discreet.
- Place the end of the spiral with the long red tail behind the beard. Stitch through several red stitches at that end and the back loops of the white disk. Keep the front of the scallops and the rest of the spiral free.
- Weave in the remaining ends. Attach the key ring to the reinforced loop directly or with the short chain. Give it a light tug and add a few reinforcing stitches if the loop shifts.
Troubleshooting
- The body is barely curling. Check that each working chain has three double crochets. If the foundation is too tight to work into, make just the chain with a slightly larger hook.
- The beard is off-center. Count back from the middle scallop. Each scallop repeat uses four base stitches, including the two skipped stitches. Align the eyes above the center scallop before sewing.
- The hat covers the eyes. Pin the brim to the face before sewing, then reduce the overlap until the eyes are clear.
Variations and Care
For a shorter bag charm, reduce the body chain by a few stitches. For a tree ornament, replace the metal ring with a ribbon threaded through the reinforced loop. Spot-clean with a damp cloth and let it dry flat. Keep the charm and any detachable hardware away from small children.
Frequently Asked Questions
Does the spiral need a second row?
One row is enough. Working three dc into each foundation chain gives the red strip its curl.
How do I make the face fit my hat?
Pin the widest part of the face at the hat opening before sewing. If the panels came out too narrow, add one more increase row to each panel before working the two even brim rows.
Can I use beads for the eyes and nose?
Embroidery keeps the face flat and uses the same yarn as the other pieces. If you choose sew-on beads for a decorative charm, attach them before closing the hat so you can reach the back of the face.