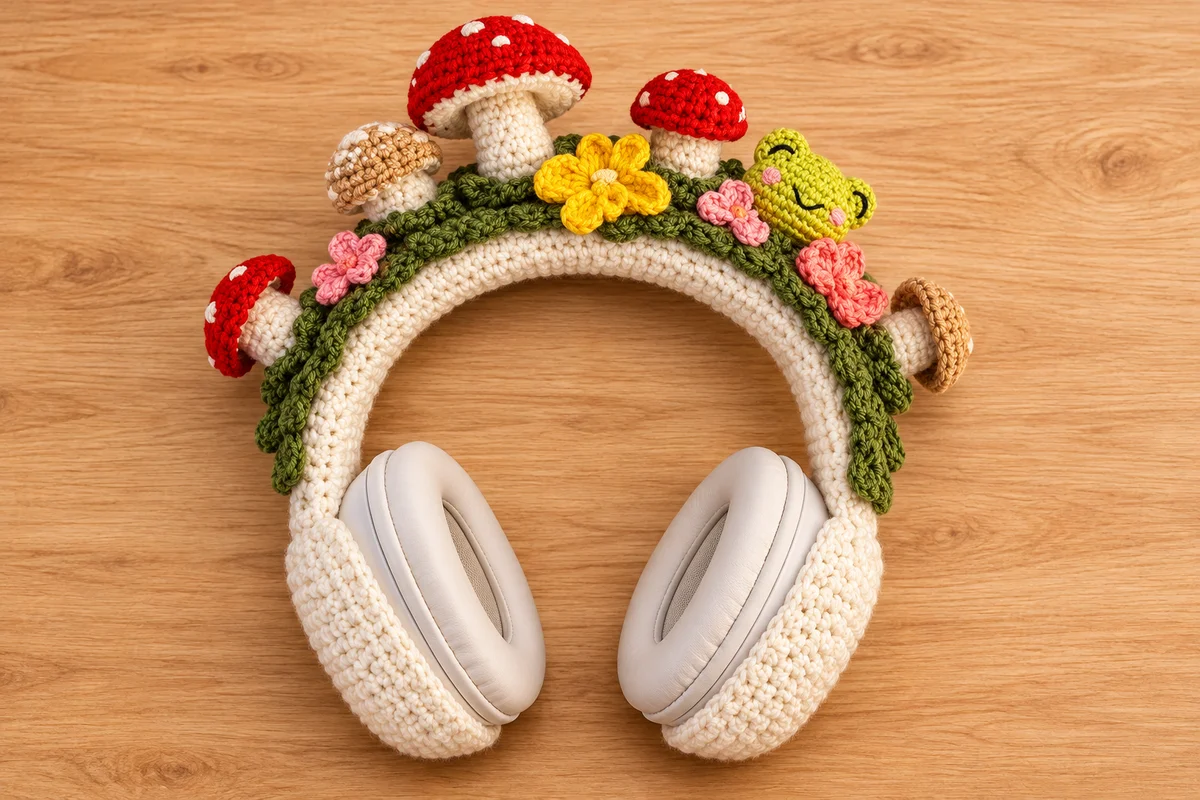
Give over-ear headphones a woodland look with a cream crochet wrap, a green vine, tiny red mushrooms, pastel flowers, and a smiling frog. The headband wrap laces shut so you can remove it, and the optional ear-cup sleeves are measured separately.
Pattern status. This original pattern was inspired by the supplied image and has yet to be test crocheted. The images are AI-generated illustrations. The pattern uses lightweight, flat motifs to make the wrap easier to wear. Measure your own headphones for fit.
Jump to the free crochet pattern ↓
Project Overview
| Detail | Pattern information |
|---|---|
| Skill level | Confident beginner comfortable with flat rows, small motifs, and sewing |
| Terminology | US crochet terms |
| Construction | Flat laced headband wrap, sewn appliqués, and optional fitted ear-cup sleeves |
| Size | Measured to fit your own headphones. Example wrap is about 20 × 7 cm before lacing. |
| Gauge | Use your blocked single crochet swatch. The sizing example assumes 20 sc and 22 rows per 10 cm. |
Materials and Tools
- DK cotton in cream, moss green, light green, red, yellow, and pink, with a little black for embroidery.
- 3.5 mm crochet hook as a starting point, tapestry needle, markers, scissors, flexible tape, and optional soft elastic cord for cup sleeves.
- Your headphones for fitting and marking any controls, charging ports, microphones, vents, and docking points.
Abbreviations
ch chain, sc single crochet, hdc half double crochet, dc double crochet, sl st slip stitch, MR magic ring, inc 2 sc in one stitch, st stitch, Rnd round. Starting ch 1 and joining slip stitches do not count.
Free Woodland Crochet Headphone Cover Pattern
1. Measure and Crochet the Headband Wrap
Measure along the outside arc of the fixed part of the headband. Leave the sliders and hinges clear. Measure around the thickest cross-section of that area. Subtract about 5 mm from the circumference so there is a narrow gap for lacing underneath.
| Count | Calculation | Example |
|---|---|---|
| Stitches along the arc | Usable arc length × stitches per cm | 20 × 2 = 40 sc |
| Rows around the band | Adjusted circumference × rows per cm, rounded to a whole row | (7.5 − 0.5) × 2.2 ≈ 15 rows |
In cream, ch one more than your stitch count (41 in the example). Row 1: sc in the second ch from the hook and each remaining ch (40). Row 2: ch 1, turn, and sc across (40). Repeat Row 2 until the rectangle nearly meets under the band (15 total rows in the example). Pinch the long edges together underneath to check the fit. Fasten off and weave in the ends.
2. Crochet the Vine and Leaves
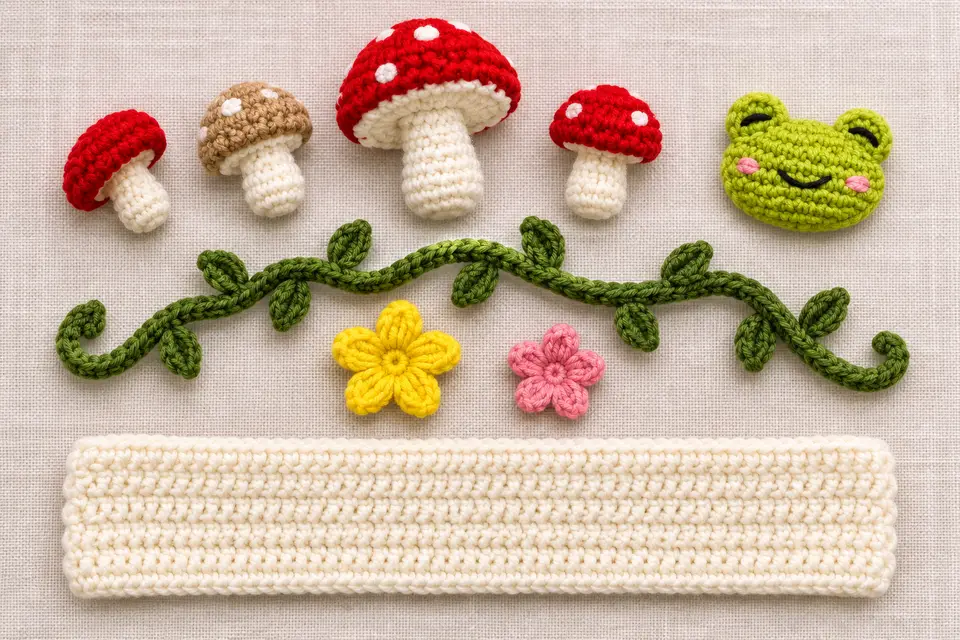
With moss green, make a loose chain about as long as the wrap, plus one ch. Sl st into the second ch from the hook and each remaining ch. Leave a long tail for sewing. For each leaf, ch 6. Starting in the second ch, work sc, hdc, dc, hdc in the next four chains. Work 3 sc in the last ch, then turn the piece and work hdc, dc, hdc, sc into the four unused loops along the opposite side (11 sts). Join to the first sc. Make four to six leaves and leave tails at their bases.
3. Make Small Mushroom Appliqués
Cap. With red, work 5 sc in MR without joining. Ch 1 and turn. Inc in each st (10). Ch 1 and turn. Work [sc, inc] five times across (15). Fasten off, leaving a tail. Pull the ring snug and keep the two row ends as the lower edge of the cap. Embroider cream dots on the red with two or three short stitches per dot.
Stem. With cream, ch 5. Sc in the second ch and across (4). Ch 1, turn, and sc across (4). Repeat for four rows total. Sew the top row of the stem behind the middle of the cap’s straight edge. Make two or three mushrooms. For a smaller cap, stop after the 10-stitch row and shorten the stem to three rows.
4. Crochet the Flowers and Frog Face
Flower. Work 5 sc in MR and join to the first sc. In that stitch work [sl st, ch 2, 2 dc, ch 2, sl st]. Repeat that entire group in each of the next four sc (five petals). Fasten off and leave a tail. Make one yellow flower and one or two pink flowers.
Frog. Work Rnds 1–3 continuously without joining between rounds. Mark the first stitch of each round and move the marker up as you go. In light green, Rnd 1: work 6 sc in MR (6). Rnd 2: inc in each st (12). Rnd 3: [sc, inc] six times (18). Sl st to the first sc of Rnd 3 and fasten off. For the eye bumps, pick two stitches along the top with three stitches between them. Join green in the first and work [sl st, hdc, dc, hdc, sl st] in that one stitch. Fasten off and repeat in the second marked stitch. Embroider a small black eye in each bump and a curved smile below.
5. Sew the Motifs and Lace the Wrap
- Lay the cream wrap flat with the side that will face out toward you. Pin the vine lengthwise down its center. Alternate leaf directions, and keep their tips within the band area.
- Pin the mushrooms, flowers, and frog over the vine. Check the arrangement on the headband before sewing, especially where the band bends toward the ear cups.
- Remove the wrap from the headphones. Sew the vine and appliqué edges to the wrap. Bury the tails in the crochet fabric, then put the wrap back on.
- Make a cream chain long enough to cross the underside repeatedly. With a blunt needle, lace through the two long edges in a zigzag, picking up a loop every three to four stitches. Tie a removable bow underneath and tuck the ends into the wrap.
6. Make Optional Ear-Cup Sleeves
Use sleeves only where the outer shell has a continuous rim and the fabric can leave microphones, vents, controls, hinges and charging ports clear. Check the fit on each cup, since the two sides may have different hardware.
Face panel. Place the cup outer-face down on paper and trace its outline. Crochet a cream rectangle using the same sc rows as for the wrap. Set the chain length from the trace width and the row count from the trace height using your swatch. For a rounded rectangle, omit one stitch at each end of the starting width, then increase once at each edge on Row 2. On the second-to-last row, sc2tog at each end. To sc2tog, pull up a loop in each of two stitches, then yarn over and pull through all three loops. Work the last row even. Compare the panel to the trace and adjust before edging.
Example for an 8 × 10 cm cup. At 20 sc and 22 rows per 10 cm, a rectangular face panel needs 16 sc across and 22 rows. Ch 17 to begin. For rounded corners, start with ch 15 (14 sc), increase to 16 sc on Row 2, decrease to 14 sc on Row 21, and work Row 22 even. If the usable shell rim is 1 cm deep, measure the edging and side wall together as you work. Stop when the fabric reaches the rim with the controls, vents, microphones and cushion still clear.
Side wall. Work one round of sc around the panel. Along row ends, space the stitches so the edge lies flat. Mark the count and join. Ch 1 and work one sc in the back loop of each stitch, then continue in joined rounds through both loops with one sc per stitch until the sleeve reaches the outer shell rim. Weave a soft elastic cord through the final round and adjust it so it grips the shell rim while leaving the ear cushion and sound opening fully exposed. Fasten the cord and tuck the knot into the edge. If the sleeve slips or covers hardware, use the headband wrap on its own.
Troubleshooting and Care
| If you notice | Try this |
|---|---|
| The wrap rotates | Even out the lacing from the center toward the ends. Shorten the width by a row if the edges overlap. |
| The motifs bunch at the bend | Spread them farther apart and anchor each piece with several loose tacks. |
| A cup sleeve blocks a control | Shorten the side wall or leave that cup bare. |
Remove the covers to wash them. Follow the yarn label and reshape the pieces flat while they dry. For an autumn palette, use rust and ochre flowers with tan caps. For a simpler wrap, use only the vine and two mushrooms.
Frequently Asked Questions
Will this fit every pair of headphones?
The wrap can be sized to many fixed headbands. Measure the usable length and circumference on your pair. The optional sleeves depend on the cup shape and hardware placement.
Can I use worsted yarn?
Yes. Make a fresh swatch, use its counts for the wrap, and pin the motifs before sewing to check that they sit comfortably.
Is the decoration removable?
The motifs are sewn to the crochet wrap. Untie the lace to remove the decorated wrap as one piece.