
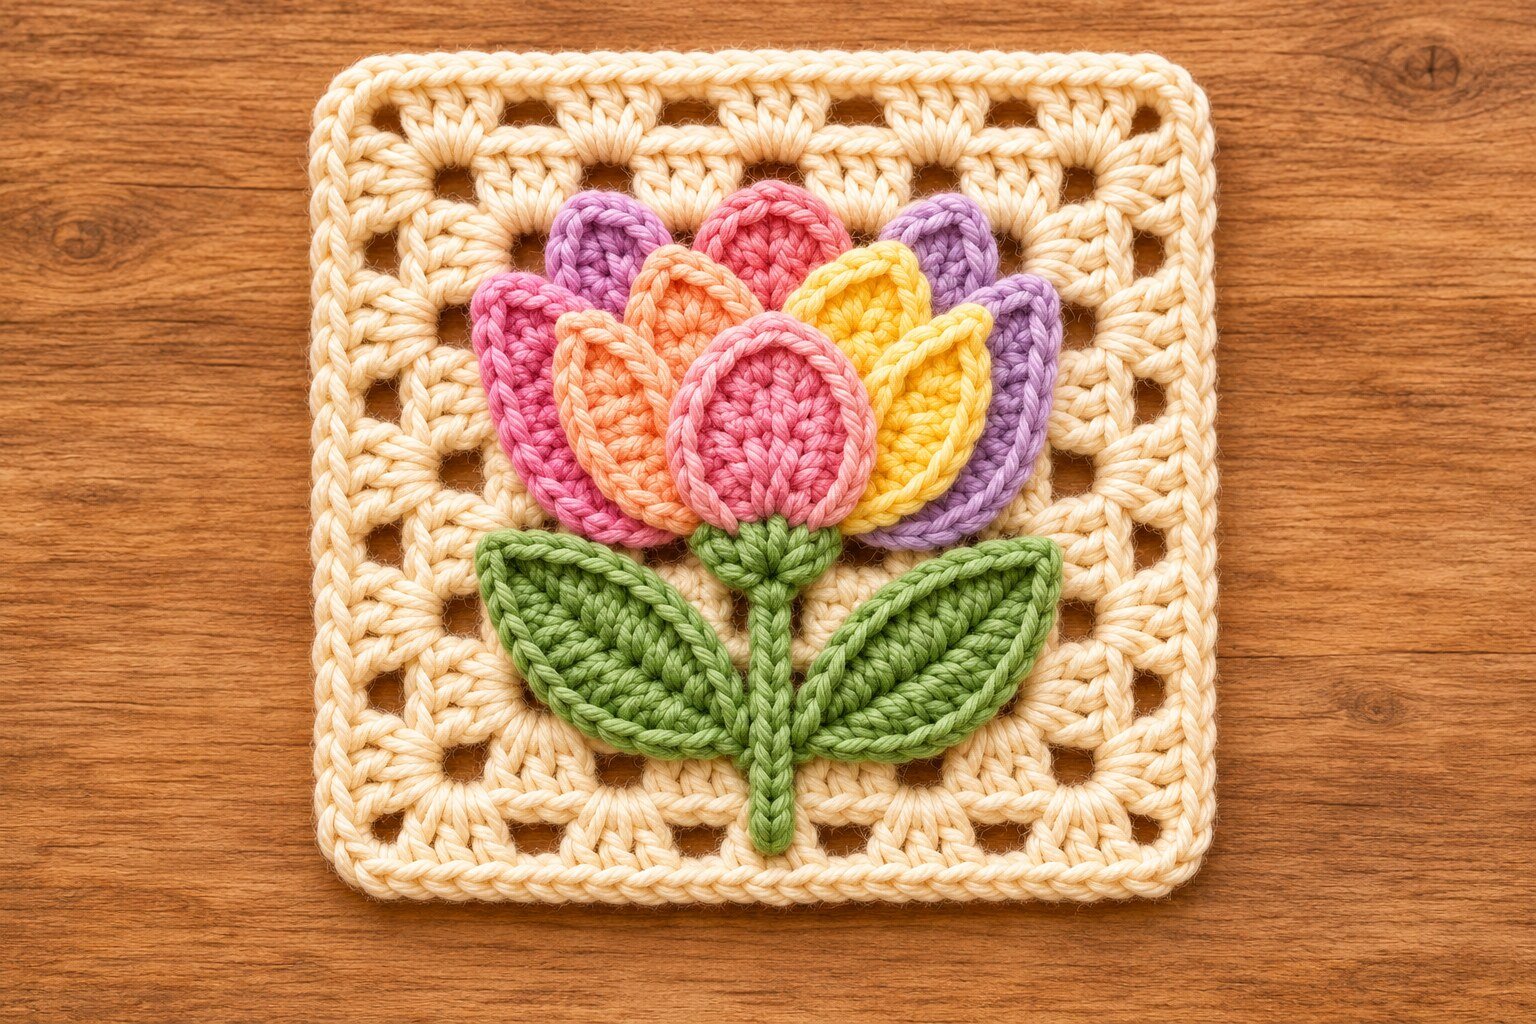

A cream granny square frames this pastel rainbow tulip. Five small petals overlap to form one flower, and two sage leaves sit beside a short green stem. Crochet the square and appliqué separately, then pin the pieces in place so you can adjust the shape before sewing.
Pattern status. This original pattern was inspired by the supplied image and has yet to be test crocheted. The pictures are AI-generated illustrations. Use the written stitch counts and placement instructions for the project.
Jump to the free crochet pattern ↓
Project Overview
| Detail | Pattern information |
|---|---|
| Skill level | Confident beginner familiar with double crochet and sewing small pieces |
| Terminology | US crochet terms |
| Construction | Six joined granny rounds, five oval petals, two pointed leaves, and a slip stitch stem |
| Size and gauge | No fixed gauge or measured finished dimensions. Block and measure your first square if you plan to join several motifs. |
Materials and Tools
- DK cotton yarn in cream for the square, plus small amounts of dusty pink, lilac, peach, butter yellow, and sage green.
- A 3.5 mm crochet hook as a starting point. For a firmer appliqué, try a 3 mm hook and check the proportions against the square before sewing.
- A blunt tapestry needle, scissors, removable markers, and optional rustproof pins for blocking.
Use the same yarn weight for all the petals so they layer evenly. Before making a set, measure your blocked square across the middle. If you need a larger background, add a granny round before working the optional border.
Abbreviations and Pattern Notes
| Abbreviation | Meaning |
|---|---|
| ch | Chain |
| ch-1 sp / ch-2 sp | Chain-1 space / chain-2 space |
| dc | Double crochet |
| hdc | Half double crochet |
| MR | Magic ring |
| sc | Single crochet |
| sl st | Slip stitch |
| Rnd / st | Round / stitch |
A granny group is 3 dc in the same space. The beginning ch 3 counts as one dc. Work the square in joined rounds without turning. The petals and leaves are worked around both sides of a foundation chain. Their joining slip stitches are outside the stitch count.
Free Pastel Rainbow Tulip Granny Square Pattern
1. Crochet the Cream Granny Square
Rnd 1. With cream, make an MR. Ch 3 and work 2 dc into the ring. Work [ch 2, 3 dc into the ring] three times. Ch 2 and join with a sl st to the top of the beginning ch 3. Pull the center closed. (4 groups and 4 corner spaces)
Start Rnds 2–6. Sl st across the dc before the first corner and into the ch-2 space. Cross two dc at the start of each round. In that space, work ch 3, 2 dc, ch 2, and 3 dc.
Work the sides. On each side, work [ch 1, 3 dc in the next ch-1 sp] for every ch-1 space from the previous round. Rnd 2 has no previous ch-1 spaces, so skip this repeat on that round. Ch 1 to reach the next corner. In that corner, work [3 dc, ch 2, 3 dc]. Continue around all four sides. After the final side and its last ch 1, join to the top of the beginning ch 3 without remaking the starting corner.
| Rnd | Groups per side between corner spaces | Total dc |
|---|---|---|
| 1 | 1 | 12 |
| 2 | 2 | 24 |
| 3 | 3 | 36 |
| 4 | 4 | 48 |
| 5 | 5 | 60 |
| 6 | 6 | 72 |
Optional cream border. Join cream in any corner. Ch 1, then work 3 sc in each corner, 1 sc in each dc, and 1 sc in each side ch-1 space. Join to the first sc. (104 sc after six granny rounds) Fasten off, weave in the ends, and block the square flat before attaching the flower.
2. Crochet Five Tulip Petals
Make two dusty pink petals, one lilac, one peach, and one yellow. Use the same petal instructions for each piece.
- Ch 8. Starting in the second ch from the hook, work sc, hdc, dc, dc, hdc, sc, one stitch into each of the next six chains.
- Work 3 sc into the last chain. Rotate the work so you can crochet into the unused loops on the other side.
- Work sc, hdc, dc, dc, hdc, sc, one stitch into each of the six remaining chain positions. Join with a sl st to the first sc. (15 sts)
- Fasten off with a sewing tail. The end where the first and last stitches meet is the base. If you want a two-tone outline, loosely sl st around the 15 stitches with a lighter shade of the same color. Keep the outline relaxed so the petal stays flat.
3. Crochet Two Leaves and a Stem
Leaves, make two. With sage, ch 10. Starting in the second ch, work sc, hdc, dc, dc, dc, dc, hdc, sc, one stitch into each of the next eight chains. Work 3 sc into the last chain. Rotate and work sc, hdc, dc, dc, dc, dc, hdc, sc, one stitch into each remaining position on the other side. Join to the first sc with a sl st. (19 sts) Leave a sewing tail. Pinch the far end slightly as you pin the leaf to suggest a point.
Stem. With sage, ch 11. Sl st in the second ch from the hook and in each remaining ch. (10 sl st) Check the length on the blocked square and leave a long tail for sewing. If the stem reaches the outer joining stitches, remake it with a shorter chain.
How to Assemble the Tulip Granny Square

- Pin the stem and leaves. Center the stem vertically in the lower half of the square. Set the two leaf bases against its lower half, with the tips pointing out and slightly up. Keep the outermost square round accessible for joining.
- Arrange the petals. Put one pink petal and the lilac petal at the back, with their tips fanning outward. Layer peach over the left side and yellow over the right. Place the second pink petal upright at the front. Bring all five bases together where the stem ends.
- Sew the pieces. Attach the stem first, then the leaves and the petals in the order you layered them. Catch the appliqué and a solid granny group underneath each tack. Sew the petal bases and add a few small stitches along the sides. Leave the tops free for a raised effect.
- Finish the flower base. Use sage yarn to embroider three short stitches fanning upward from the top of the stem. Cover the petal bases and weave the ends into matching stitches on the wrong side.

Troubleshooting
| If you notice | Try this |
|---|---|
| The square loses its corners | Check for a ch-2 space at every corner and a ch-1 space between groups on the sides. |
| A petal cups after edging | Loosen the slip stitches or use a larger hook for the outline. |
| The flower spreads too wide | Overlap the petals more at their bases and sew a small tack where neighboring petals meet. |
| The square puckers around the stem | Release the sewing tension and use short tacks over solid stitches instead of pulling across an open space. |
Variations and Care
Fuller ten-petal flower. Make three pink, three lilac, two peach, and two yellow petals using the same instructions. Pin three rear petals in lilac, pink, and lilac, then two middle petals in peach and yellow. In front, fan out five petals in pink, peach, pink, yellow, and lilac, keeping the middle pink petal on top. Overlap the bases and sew from back to front. If the flower reaches the outer edge, add another granny round before attaching it.
Try five shades of pink for a monochrome tulip, or make a different color combination on every square. For a cushion or tote panel, sew the petal edges down farther so they lie flatter. Follow the yarn label for washing, and shape the petals and corners while the square dries flat.
Frequently Asked Questions
Can I make the tulip without the granny square?
Yes. Sew the overlapping petal bases together and attach the stem and leaves to a firm fabric or crochet surface.
How do I make the square larger?
Repeat the granny round with one more side group per side on each new round. Keep the four corner spaces and measure the blocked square before adding a border.
Can I join these squares into a blanket?
Yes. Make all the squares to the same blocked size and leave the outer edges clear. If you add the single crochet border, use it on every square so the edge counts match.