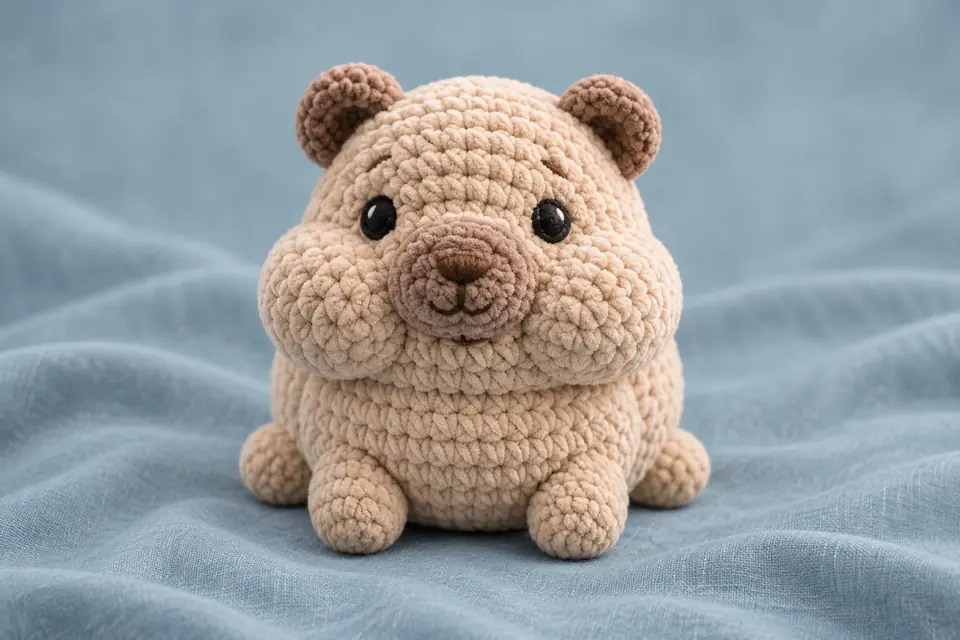
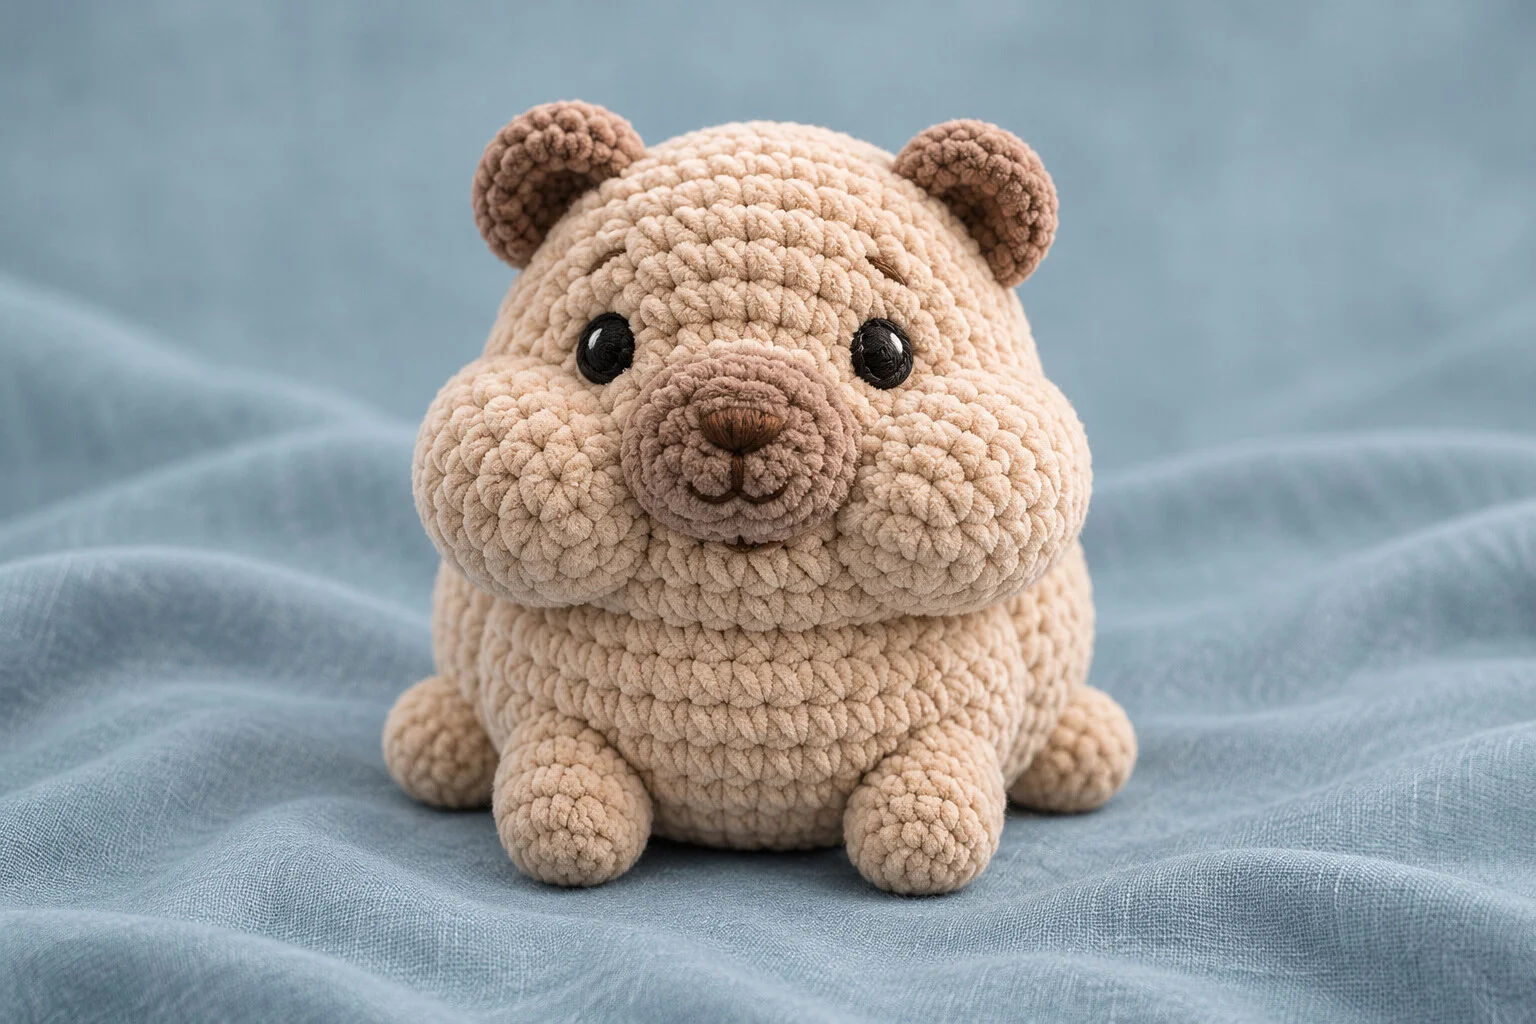
This plush crochet hamster gets its expression from three small pieces: two round cheek pads and a shorter muzzle between them. The head and body are worked separately, so you can tilt the head and adjust the face before sewing. Short paws sit low on the body to help the hamster rest on a flat surface.
Pattern status. This free pattern was drafted from a reference image and has yet to be test crocheted. The reference and the AI-generated cover show the intended look. The assembly diagram shows the proposed layout.
Before You Start
| Project detail | Pattern information |
|---|---|
| Skill level | Confident beginner familiar with sewing amigurumi pieces |
| Terminology | US crochet terms |
| Construction | Separate head and body, two ears, two cheeks, one muzzle, four paws, and a short tail |
| Working method | Continuous rounds unless stated otherwise |
| Finished size | Varies with yarn and tension. A finished sample measurement is pending. |
Materials and Tools
- Super bulky chenille yarn in oatmeal beige for the head, body, cheeks, paws, and tail.
- Small amounts of similar-weight taupe chenille for the ears and muzzle.
- Smooth black or dark brown yarn for embroidered eyes, nose, and mouth. A little ivory yarn is optional for eye highlights.
- 5 mm crochet hook as a starting point, locking stitch marker, blunt yarn needle, scissors, and polyester fiberfill.
- Optional matching smooth yarn for sewing the chenille pieces together.
Choose a hook that makes a dense fabric you can still work into comfortably. If you see gaps when you gently stretch the fabric, try a smaller hook. Keep the beige and taupe yarns similar in thickness so the muzzle sits neatly between the cheeks.
Stitches and Pattern Notes
| Abbreviation | Meaning |
|---|---|
| MR | Magic ring |
| ch | Chain |
| sc | Single crochet |
| inc | Work 2 sc in the same stitch |
| inv dec | Insert the hook through the front loops of the next two stitches, yarn over and pull through both front loops, then yarn over and pull through the two loops on the hook |
| st / sts | Stitch / stitches |
| Rnd / Rnds | Round / rounds |
Move the marker to the first stitch of every round. Repeat bracketed instructions the stated number of times. The number in parentheses is the stitch count at the end of that round. If your chenille catches when you close a magic ring, chain 2 and work the starting 6 sc in the second chain from the hook. Secure the starting tail on the inside.
Free Plush Crochet Hamster Pattern
1. Head
Start at the crown with beige yarn.
- Rnd 1. 6 sc in MR. (6)
- Rnd 2. Inc in each st. (12)
- Rnd 3. [Sc, inc] 6 times. (18)
- Rnd 4. [2 sc, inc] 6 times. (24)
- Rnd 5. [3 sc, inc] 6 times. (30)
- Rnd 6. [4 sc, inc] 6 times. (36)
- Rnd 7. [5 sc, inc] 6 times. (42)
- Rnds 8–13. Sc in each st. (42 per round)
- Rnd 14. [5 sc, inv dec] 6 times. (36)
- Rnd 15. [4 sc, inv dec] 6 times. (30)
- Rnd 16. [3 sc, inv dec] 6 times. (24)
- Rnd 17. [2 sc, inv dec] 6 times. (18)
- Rnd 18. [Sc, inv dec] 6 times. (12)
- Rnd 19. Inv dec 6 times. (6)
Begin stuffing after Rnd 16. Add small tufts as you close the head so it stays round without exposing the filling. Fasten off after Rnd 19. Thread the tail through the front loops of the last 6 stitches, draw closed, and bury the tail.
2. Body
Start at the base with beige yarn. Leave a long tail at the neck opening for sewing.
- Rnd 1. 6 sc in MR. (6)
- Rnd 2. Inc in each st. (12)
- Rnd 3. [Sc, inc] 6 times. (18)
- Rnd 4. [2 sc, inc] 6 times. (24)
- Rnd 5. [3 sc, inc] 6 times. (30)
- Rnd 6. [4 sc, inc] 6 times. (36)
- Rnds 7–11. Sc in each st. (36 per round)
- Rnd 12. [4 sc, inv dec] 6 times. (30)
- Rnd 13. Sc in each st. (30)
- Rnd 14. [3 sc, inv dec] 6 times. (24)
- Rnd 15. [2 sc, inv dec] 6 times. (18)
Fasten off, keeping the neck open. Stuff the body, pressing the base gently against a flat surface as you shape it. Keep the last round flexible for sewing.
3. Ears, Cheeks, and Muzzle
Ears, make two in taupe. Rnd 1: 6 sc in MR (6). Rnd 2: inc in each st (12). Rnd 3: [sc, inc] 6 times (18). Rnd 4: sc in each st (18). Fasten off with a sewing tail. Flatten each ear without stuffing and pinch the center of the open edge to create a shallow cup. Sew through both layers when attaching the base.
Cheeks, make two in beige. Rnd 1: 6 sc in MR (6). Rnd 2: inc in each st (12). Rnd 3: [sc, inc] 6 times (18). Rnd 4: sc in each st (18). Rnd 5: [sc, inv dec] 6 times (12). Fasten off and leave a sewing tail. Leave the back open and add a small tuft of stuffing just before the seam closes.
Muzzle, make one in taupe. Rnd 1: 6 sc in MR (6). Rnd 2: inc in each st (12). Rnds 3–4: sc in each st (12 per round). Fasten off with a sewing tail and leave the back open. Embroider the nose on the closed end. Make two short diagonal stitches for the outline, fill between them, then add one vertical stitch and two short mouth curves below. Tie the embroidery tails on the inside and lightly stuff the muzzle when sewing it on.
4. Four Paws and a Short Tail
Paws, make four in beige. Rnd 1: 6 sc in MR (6). Rnd 2: inc in each st (12). Rnds 3–5: sc in each st (12 per round). Rnd 6: [2 sc, inv dec] 3 times (9). For the two front paws, add Rnd 7 with sc in each st (9). For the two hind paws, stop after Rnd 6. Add a little stuffing at each tip. Fasten off with a sewing tail and flatten the open end.
Tail, make one in beige. Rnd 1: 6 sc in MR (6). Rnd 2: [sc, inc] 3 times (9). Rnd 3: sc in each st (9). Fasten off and leave a sewing tail. Keep it soft with little or no stuffing.
How to Assemble the Hamster
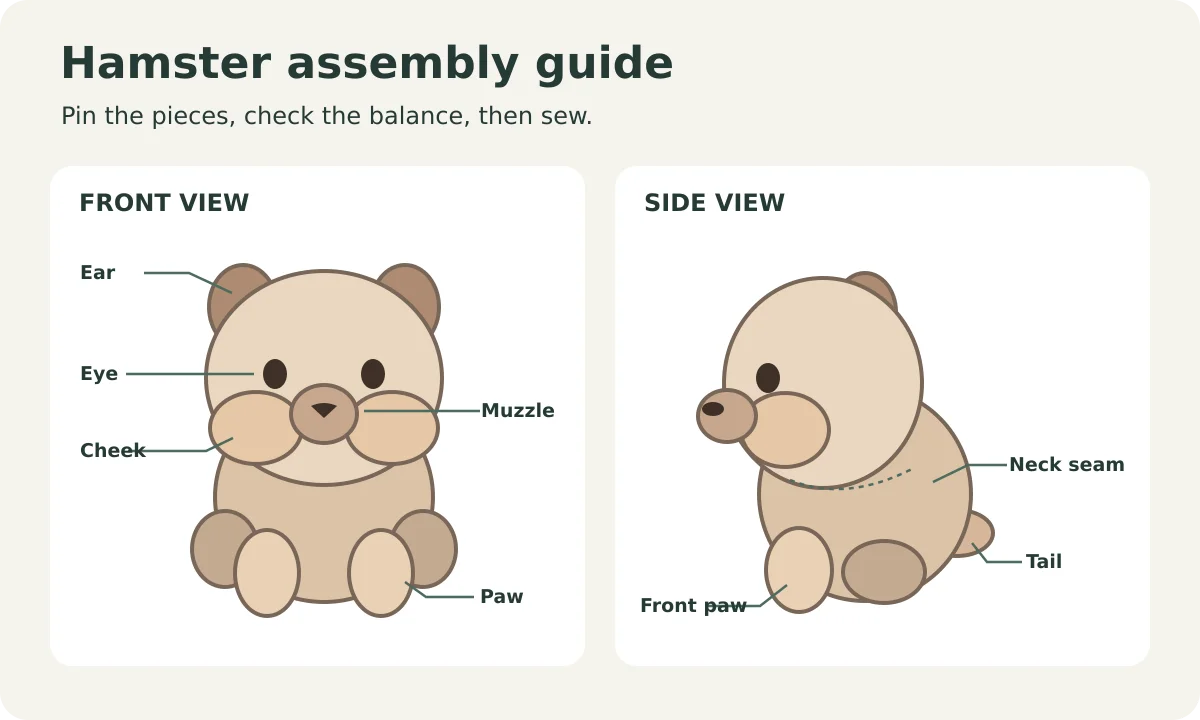
- Pin the face. Choose a front centerline. Center the muzzle around Rnds 11–14 and pin a cheek to either side. Let the pads sit a little lower than the center of the muzzle. Place temporary eye markers near Rnds 9–10, roughly 4–5 stitches to each side of the centerline. Check the face from the front and from above, then shift the cheeks if they cover the eye marks.
- Attach the cheeks and muzzle. Sew each open rim to the head, catching a loop from the rim and a corresponding stitch on the head. Add a small tuft of stuffing before closing each seam. Ease the edges together so the pads keep their shape. Add the two embroidered oval eyes once the face pieces are fixed. Bury the eye yarn tails through the stuffed head.
- Sew on the ears. Pin the ears high on the head near Rnds 4–7, angled slightly outward. Check that both sit at the same height. Sew through both layers at each ear base, then pass back along the seam to secure the corners.
- Join head and body. Set the head on the open neck with the face tipped slightly forward. Pin the neck edge to the underside of the head at four evenly spaced points. With the body yarn tail, catch one neck stitch and one nearby head stitch at a time. Ease the 18 neck stitches evenly around the marked circle, add filling at the neck if needed, and secure the seam.
- Add the paws and tail. With the hamster on a flat surface, pin the longer paws low at the front. Pin the shorter pair at the lower sides, slightly behind the front paws. Check that the body rests evenly before sewing the flattened ends in place. Sew the tail low at the back, centered between the hind paws.
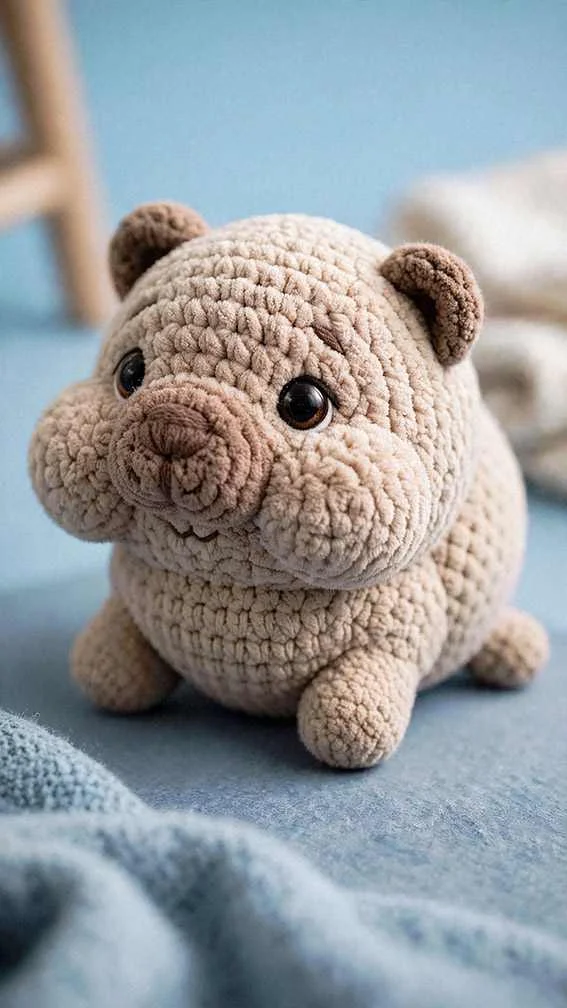 AI-generated reference image used as inspiration for this crochet design.
Troubleshooting
| If you notice | Try this |
|---|---|
| The cheeks hide the eyes | Move both cheeks slightly lower or farther outward before sewing. Pin them at the same height and recheck the face. |
| The muzzle looks flat | Add one small tuft of filling before you finish the seam. Leave the outer edge soft so it sits against the head. |
| The head wobbles | Add a little filling at the neck and sew around the full opening with evenly spaced stitches. |
| The hamster tips forward | Move the front paws slightly outward and check that the hind paws touch the surface. Reposition while the pieces are still pinned. |
| The chenille sheds as you sew | Switch to a smooth matching yarn for the seams and handle the chenille tails gently. |
Frequently Asked Questions
Can I use cotton yarn for this hamster?
Yes. Cotton will show the stitches more clearly, and a thinner yarn will usually make a smaller hamster. Match the hook to your yarn and use similar-weight yarn for the face pieces and the body.
Can I make the cheeks less prominent?
Yes. Leave them unstuffed and sew them flat, or use a smaller tuft of filling to keep just a little curve.
Can I crochet this hamster in a different color?
Yes. Try warm gray with charcoal ears, or cream with caramel ears and muzzle. Use a darker embroidery yarn so the eyes and nose are visible against the plush fabric.